How to add staff with their own PIN and permissions in Counter Billing
When two or three people use the same counter, three questions come up at night: who gave that discount, who cancelled that bill, and why is the cash box short? Staff logins answer them. Each helper taps their name and types their own 4-digit PIN, and every bill, KOT, discount, void and cash entry is written with their name.
You also decide what each person may do. A waiter can take orders but not take payment; a cashier can bill but not change prices. When a helper needs something more, the owner types a PIN once and the app writes down who allowed it.
Steps
1Set the owner PIN first
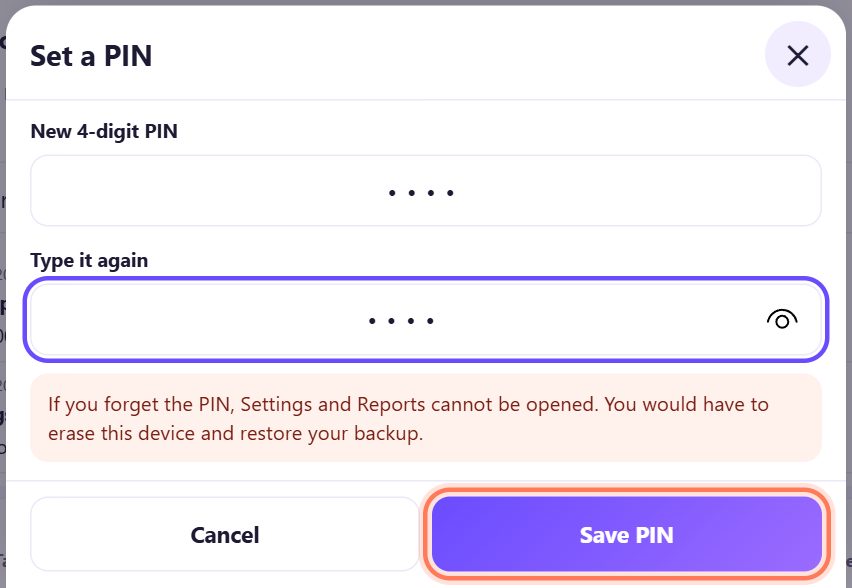
Open ⚙️ Settings (on a phone or tablet it is under ⋯ More). In 🔒 Owner PIN tap 🔒 Set a PIN, type four digits in New 4-digit PIN and again in Type it again, then tap Save PIN.
Choose a PIN your staff cannot guess (not 1234, not your shop’s phone number) and keep it only in your head or your own phone.
💡 Tip: If you forget the owner PIN, Settings and Reports cannot be opened. Keep a backup (part 8) so you can erase and restore.
2Turn on staff logins
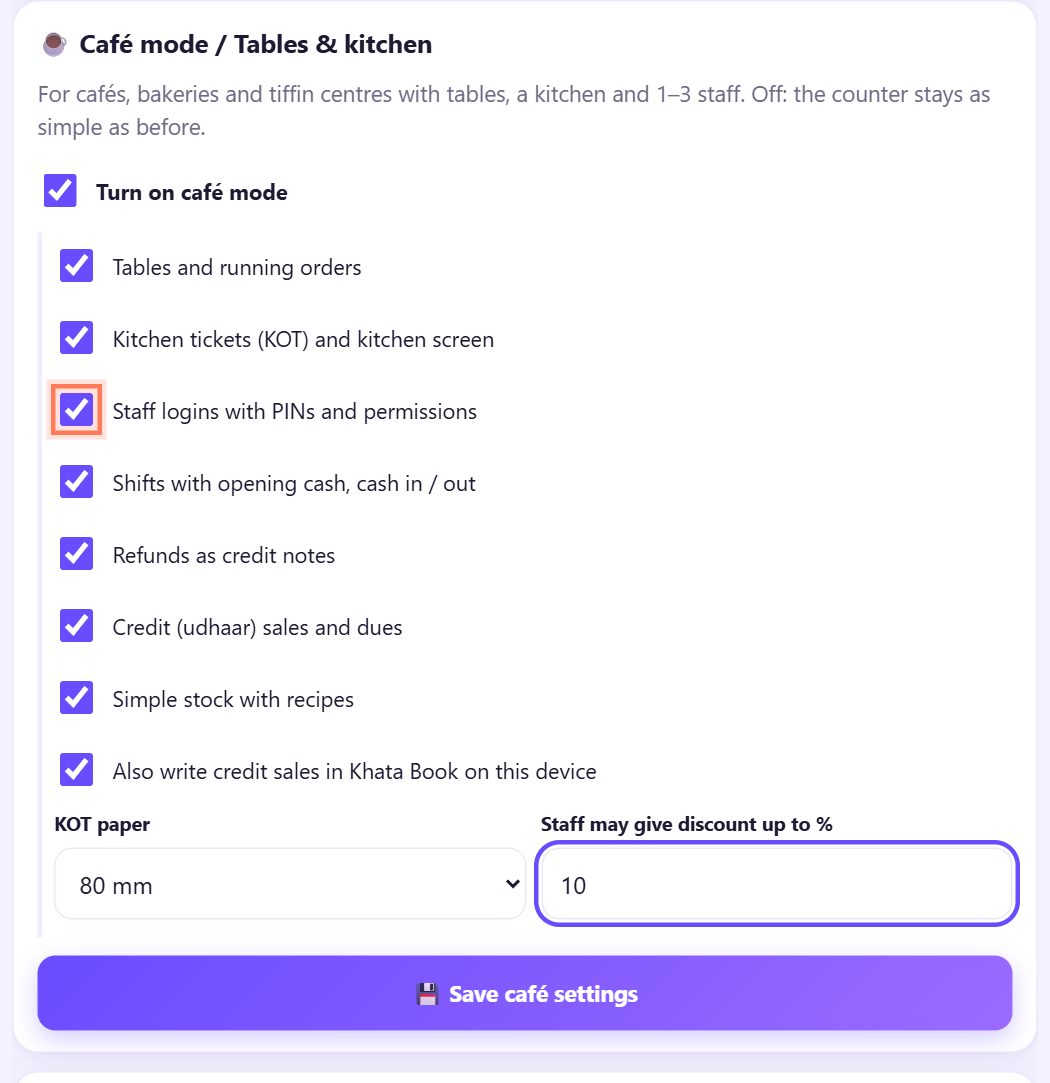
Still in Settings, go to ☕ Café mode / Tables & kitchen. Tick Staff logins with PINs and permissions. In Staff may give discount up to %, type the biggest discount a helper may give without asking (for example 10). Tap 💾 Save café settings.
A new 👥 Staff box appears below, with you as Owner.
3Add each helper with a name, role and PIN
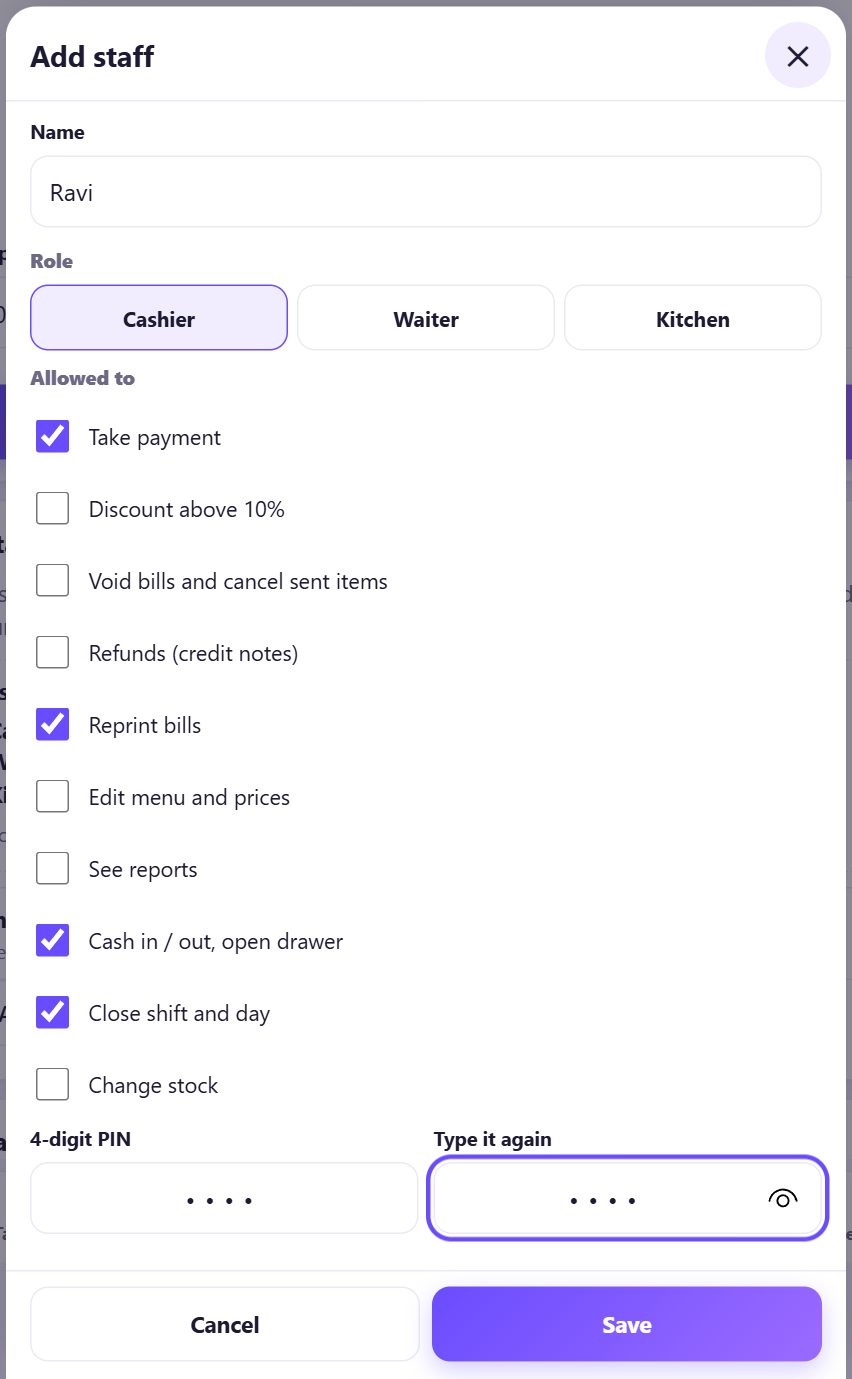
Under 👥 Staff tap ➕ Add staff. Type the Name (Ravi), pick a Role: Cashier, Waiter or Kitchen, and let the helper type their own 4-digit PIN and Type it again. Tap Save.
Two people cannot have the same name or the same PIN. A helper saved without a PIN shows ⚠ no PIN yet and cannot log in.
4Choose what each person is allowed to do
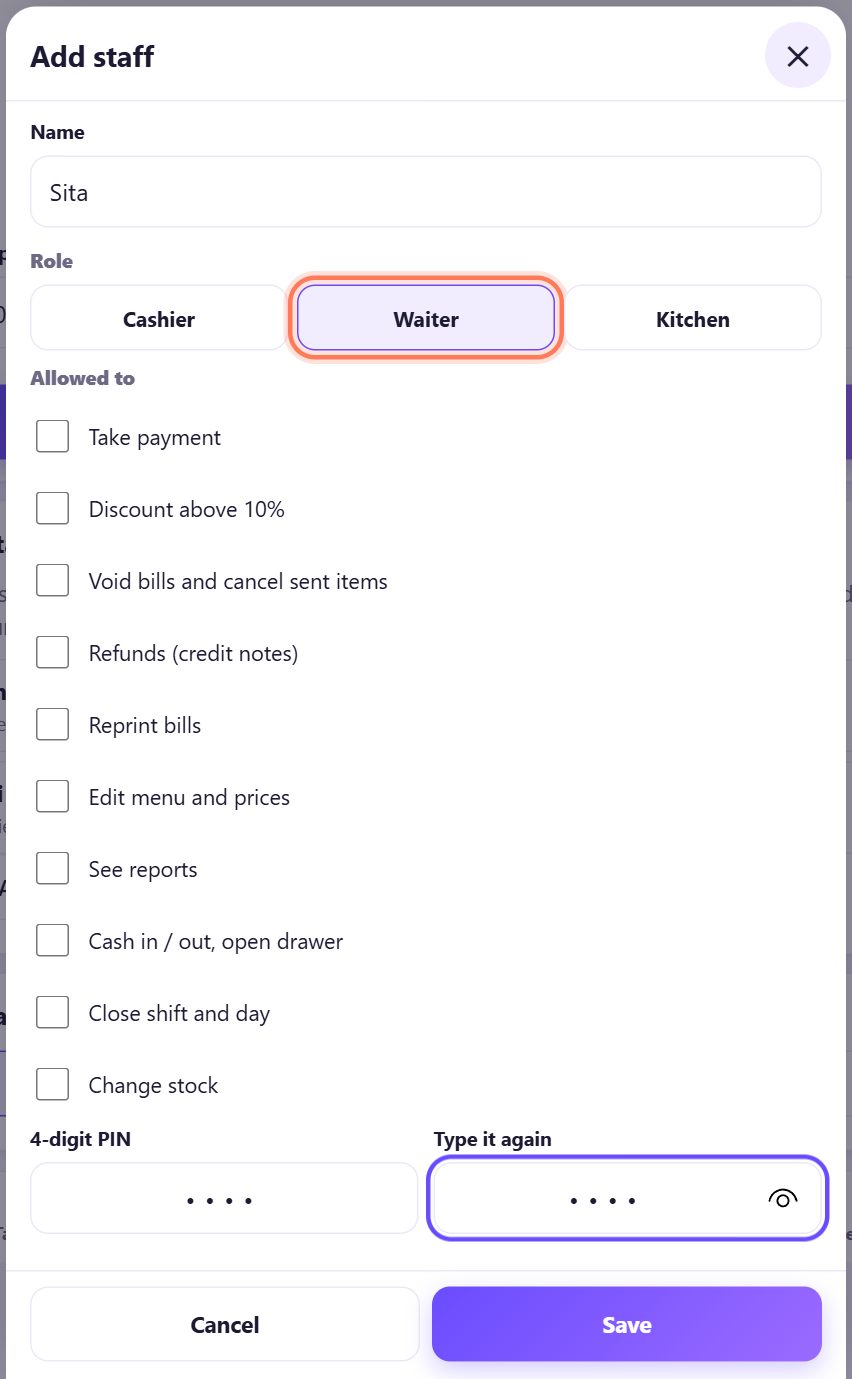
The role ticks the usual boxes under Allowed to; change any of them:
- Cashier: Take payment, Reprint bills, Cash in / out, open drawer, Close shift and day.
- Waiter and Kitchen: nothing ticked. They take orders and send KOTs, but cannot take payment.
- The other boxes: Discount above 10%, Void bills and cancel sent items, Refunds (credit notes), Edit menu and prices, See reports, Change stock.
5Each helper logs in with their PIN
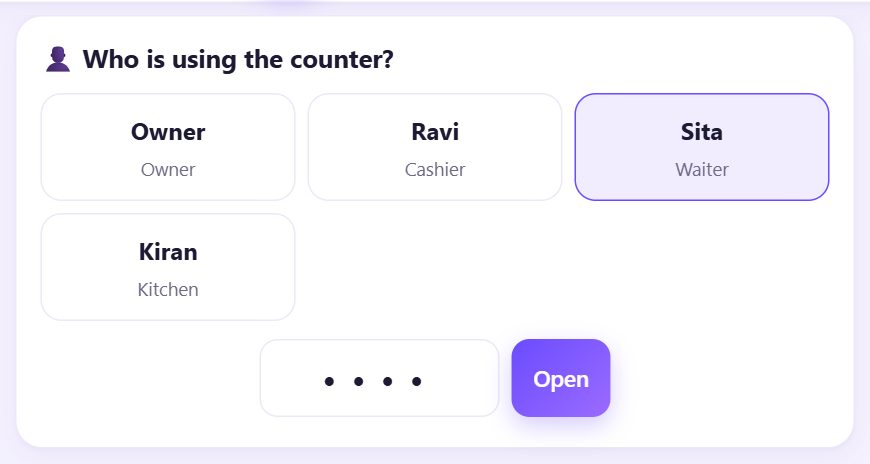
Now the counter starts with Who is using the counter? The helper taps their name, types their PIN and taps Open. A Kitchen login goes straight to the kitchen tickets.
From now on every bill, KOT, discount and cash entry carries that name.
6When a helper needs permission, someone allowed types a PIN
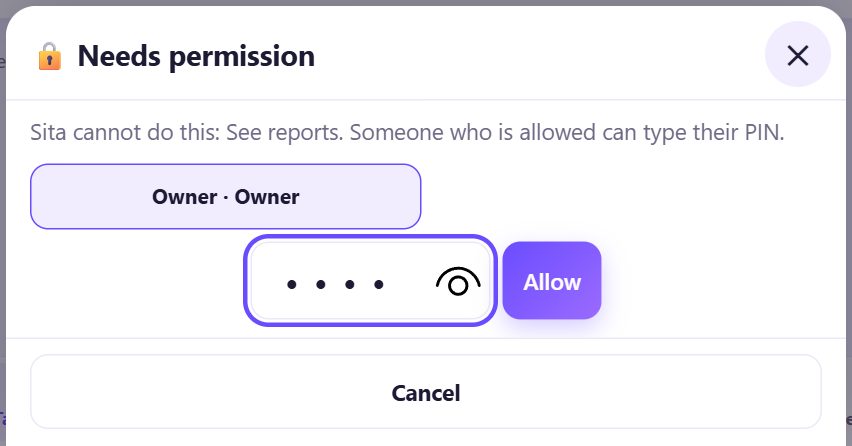
If a helper tries something they are not allowed to do (a big discount, a void, Reports), the app shows 🔒 Needs permission. The owner (or anyone allowed) picks their name, types their PIN and taps Allow.
It works for that one action only, and the activity log writes Allowed by with both names. The helper never learns your PIN.
7Hand over the counter: tap your name at the top
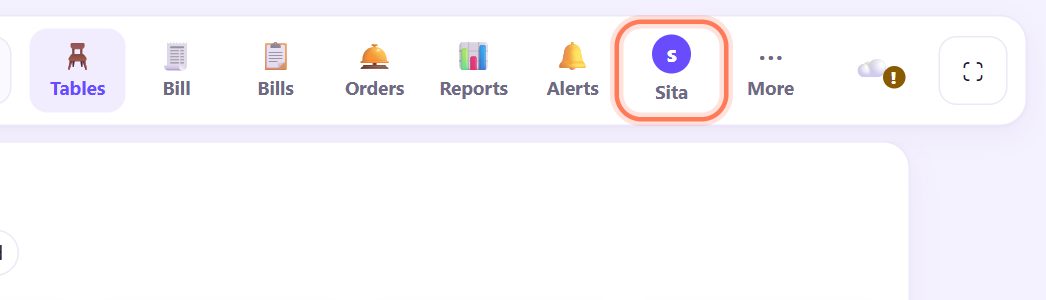
At the end of a turn, tap your name in the top bar. The counter goes back to Who is using the counter? for the next person.
Running orders, tables and the open shift stay as they are: only the name on the next bills changes.
8See who did what in the activity log
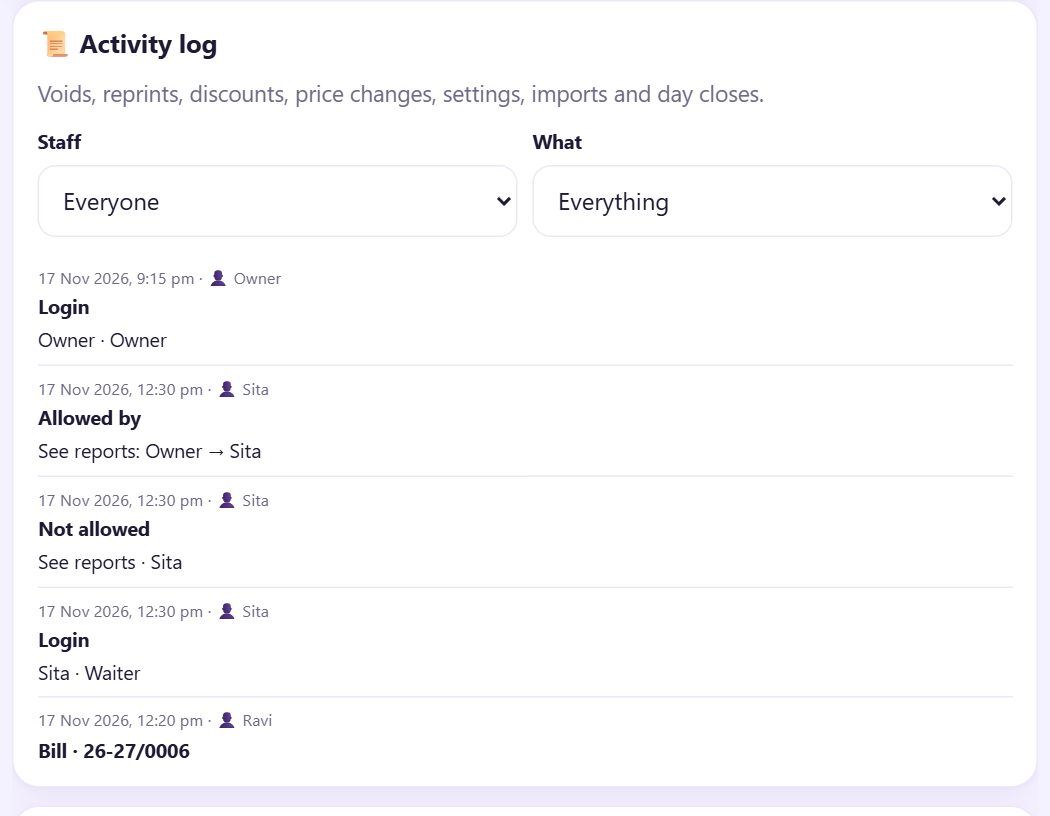
As the owner, open ⚙️ Settings and scroll to 📜 Activity log. Pick a person in Staff or a kind of entry in What (voids, reprints, discounts, price changes, logins…).
Not allowed means someone tried and was stopped; Allowed by shows who gave the permission.
💡 What comes next: Start each shift with the cash in the drawer, and record every cash in and cash out.
📝 Example: Chai & Co Café with two helpers
Meena owns Chai & Co Café. Ravi runs the counter in the morning and Sita takes orders at the tables. Meena sets her owner PIN, turns on staff logins with a 10% discount limit, and adds Ravi as Cashier and Sita as Waiter. Each chooses their own PIN on the counter tablet.
At 12:30 Sita wants to check the day’s sales in Reports. The app says Sita cannot do this: See reports; Meena types her PIN once. That night the activity log shows Ravi’s bills with his 5% discount at 12:20, Sita’s login, the Not allowed try and Meena’s Allowed by, all with times.
🛠 If something goes wrong
“Set the owner PIN first (below), then turn on staff logins.”
Staff logins need an owner PIN. Set it in 🔒 Owner PIN first, then tick the staff box again and save.
A helper sees “No PIN set for … Ask the owner to set one in Settings.”
Open 👥 Staff, tap their name and type a 4-digit PIN twice, then Save.
“Someone else already uses this PIN. Choose another.”
Every person needs a different PIN, because the PIN alone tells the app who is asking. Pick another four digits.
A helper forgot their PIN
The owner opens 👥 Staff, taps the name, types a new PIN in New 4-digit PIN (empty = keep) and taps Save.
I forgot the owner PIN
There is no reset by email or phone: nothing is stored online. Erase this device and restore your last backup (part 8). That is why a backup matters.
A helper left the job
Open their name in 👥 Staff and tap 🗑 Remove. Their old bills keep their name in reports and in the log.
🔒 Privacy in plain words
- Staff names, roles and permissions are kept only on this device, in the browser. Nothing is sent to SpriteSplit.
- PINs are stored only as a salted scrambled code, never as the four digits, and are not put in backups.
- The activity log stays on this device and goes into your own backup file or Google Drive only if you back up.
Questions people ask
How many staff can I add?
As many as you need. The screens are made for small teams of 1–3 helpers plus the owner.
Can a waiter take orders without being able to take payment?
Yes. The Waiter role takes orders and sends KOTs; Take payment is not ticked, so a cashier or the owner settles the bill.
Does each helper need their own phone?
No. Everyone uses the same counter and taps their name. A kitchen phone or tablet can show the kitchen screen (part 10).
What does “Allowed by” mean in the log?
A helper asked for something outside their permissions and an allowed person typed their PIN. The log keeps both names and the time.
Can I change a helper’s permissions later?
Yes. Tap their name in 👥 Staff, change the ticks under Allowed to and tap Save.
📚 Counter Billing step by step
All 21 parts
- 1Set up your counter
- 2Make a bill
- 3GST invoice and bill types
- 4Print, WhatsApp and QR receipts
- 5Menu: items, sizes, photos
- 6Close the day, count cash
- 7Reports & GST summary
- 8Backup, restore, PIN lock
- 9Café mode and tables
- 10Connect a kitchen screen
- 11Send KOTs to the kitchen
- 12Add a second counter
- 13Staff, roles and PINs
- 14Shifts and cash
- 15Refunds and credit notes
- 16Udhaar (credit) and dues
- 17Stock and recipes
- 18Owner dashboard
- 19Owner view on your phone
- 20Pharmacy set-up and medicines
- 21Daily pharmacy billing